Introduction
Kubernetes orchestration simplifies many common operational concerns like scheduling, auto-scaling, and failover. Usually, databases that support replication, sharding, and auto-scaling are well-suited for Kubernetes. ClickHouse and Kubernetes can perform better together.
At ChistaDATA, we are interested in writing the following series of blogs to explain the ClickHouse on Kubernetes topic.
- ClickHouse on Minikube
- ClickHouse on Google Kubernetes Engine ( GKE )
- ClickHouse on Amazon Elastic Kubernetes Service ( Amazon EKS )
This is the second part of the series.
In this blog post, we will explain the complete details of the Installation and configurations of the ClickHouse cluster on Amazon EKS.
Overview of ClickHouse on EKS
To complete the setup, we need to work on the following steps.
- Creating IAM user and configurations
- Installing AWS CLI and configurations
- Installing eksctl
- Installing Kubectl
- Creating the Amazon EKS cluster
- Creating Addon for the EBS CSI driver
- Cloning cluster configs and configurations
- Testing the connections and cluster status
Creating IAM user and configurations
The first step we would say is to create the IAM user with proper configurations. The user should have the access to AWS management console and Access key/Secret keys. Make sure you already have the access to AWS management console, If not use the link to create one.
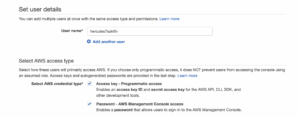
Once login the AWS console, open the IAM panel and click the create users section. Enter the user name and select the AWS management console and Access key/Secret key as shown below.
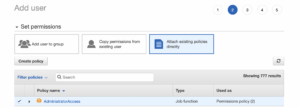
Then choose the AdministratorAccess as shown below in the permissions section, then click next.
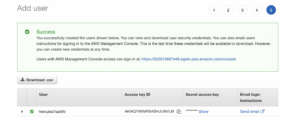
Then complete the setup. Once you click the user name, you can see the Access key and Secret Key, as shown below.
Now, we are all good with the IAM user. The next step is we need to configure this in the local terminal using awscli.
Installing AWS CLI and configurations
The AWS Command Line Interface (AWS CLI) is a unified tool to manage your AWS services. Follow the below steps to Install the was client tool. ( link )
curl "https://awscli.amazonaws.com/awscli-exe-linux-x86_64.zip" -o "awscliv2.zip"
unzip awscliv2.zip
sudo ./aws/install
Make sure you have the latest version of the awscli to avoid compatibility issues. After the installation, we need to configure the account using the command “aws configure” as shown below.
ubuntu@eksClick:~$ aws configure
AWS Access Key ID [None]: AKIAQY6KMRS4SHJUNVLM
AWS Secret Access Key [None]: xNvmA***********************************p3
Default region name [None]: us-east-2
Default output format [None]: json


ubuntu@eksClick:~$ aws configure list
      Name                    Value             Type    Location
      ----                    -----             ----    --------
   profile                <not set>             None    None
access_key     ****************NVLM shared-credentials-file
secret_key     ****************XGp3 shared-credentials-file
    region                us-east-2      config-file    ~/.aws/config
Installing Eksctl
Eksctl is a simple CLI tool for creating and managing clusters on EKS – Amazon’s managed Kubernetes service for EC2. The following steps can be used to install the eksctl client tool. ( link )
curl --silent --location "https://github.com/weaveworks/eksctl/releases/latest/download/eksctl_$(uname -s)_amd64.tar.gz" | tar xz -C /tmp
sudo mv /tmp/eksctl /usr/local/bin
eksctl version
Installing Kubectl
The Kubernetes command-line tool, kubectl, allows you to run commands against Kubernetes clusters. The following steps can be used to install the “kubectl” client tool.
sudo curl -fsSLo /usr/share/keyrings/kubernetes-archive-keyring.gpg https://packages.cloud.google.com/apt/doc/apt-key.gpg
echo "deb [signed-by=/usr/share/keyrings/kubernetes-archive-keyring.gpg] https://apt.kubernetes.io/ kubernetes-xenial main" | sudo tee /etc/apt/sources.list.d/kubernetes.list
sudo apt-get update
sudo apt-get install -y kubectl
Creating the Amazon EKS cluster
So far, we have installed and configured the necessary tools. The next step is, We need to create the Amazon EKS cluster. We will use the client tool “eksctl” to create the Amazon EKS cluster. The following configuration can be used to create the cluster.
apiVersion: eksctl.io/v1alpha5
kind: ClusterConfig

metadata:
  name: eks-ClickHouseCluster
  region: us-east-2

managedNodeGroups:
  - name: eks-ClickHouse
    instanceType: t3.xlarge
    desiredCapacity: 1
    volumeSize: 60

privateCluster:
  enabled: false
  skipEndpointCreation: false
Copy this content and store them in the .yaml file. In our case, We have created the “AmazonEKS.yaml” file and stored that config. Once the file is created, we can run the following command to create the cluster.
eksctl create cluster -f AmazonEKS.yaml
This will create the EKS cluster for you. Below We are sharing the logs for the references.
2022-10-29 18:45:16 [ℹ]  eksctl version 0.115.0-dev+2e9feac31.2022-10-14T12:52:53Z
2022-10-29 18:45:16 [ℹ]  using region us-east-2
2022-10-29 18:45:17 [ℹ]  setting availability zones to [us-east-2c us-east-2b us-east-2a]
2022-10-29 18:45:17 [ℹ]  subnets for us-east-2c - public:192.168.0.0/19 private:192.168.96.0/19
2022-10-29 18:45:17 [ℹ]  subnets for us-east-2b - public:192.168.32.0/19 private:192.168.128.0/19
2022-10-29 18:45:17 [ℹ]  subnets for us-east-2a - public:192.168.64.0/19 private:192.168.160.0/19
2022-10-29 18:45:17 [ℹ]  nodegroup "eks-ClickHouse" will use "" [AmazonLinux2/1.23]
2022-10-29 18:45:17 [ℹ]  using Kubernetes version 1.23
2022-10-29 18:45:17 [ℹ]  creating EKS cluster "eks-ClickHouseCluster" in "us-east-2" region with managed nodes
2022-10-29 18:45:17 [ℹ]  1 nodegroup (eks-ClickHouse) was included (based on the include/exclude rules)
2022-10-29 18:45:17 [ℹ]  will create a CloudFormation stack for cluster itself and 0 nodegroup stack(s)
2022-10-29 18:45:17 [ℹ]  will create a CloudFormation stack for cluster itself and 1 managed nodegroup stack(s)
2022-10-29 18:45:17 [ℹ]  if you encounter any issues, check CloudFormation console or try 'eksctl utils describe-stacks --region=us-east-2 --cluster=eks-ClickHouseCluster'
2022-10-29 18:45:17 [ℹ]  Kubernetes API endpoint access will use default of {publicAccess=true, privateAccess=false} for cluster "eks-ClickHouseCluster" in "us-east-2"
2022-10-29 18:45:17 [ℹ]  CloudWatch logging will not be enabled for cluster "eks-ClickHouseCluster" in "us-east-2"
2022-10-29 18:45:17 [ℹ]  you can enable it with 'eksctl utils update-cluster-logging --enable-types={SPECIFY-YOUR-LOG-TYPES-HERE (e.g. all)} --region=us-east-2 --cluster=eks-ClickHouseCluster'
2022-10-29 18:45:17 [ℹ]
2 sequential tasks: { create cluster control plane "eks-ClickHouseCluster",
    2 sequential sub-tasks: {
        wait for control plane to become ready,
        create managed nodegroup "eks-ClickHouse",
    }
}
2022-10-29 18:45:17 [ℹ]  building cluster stack "eksctl-eks-ClickHouseCluster-cluster"
2022-10-29 18:45:19 [ℹ]  deploying stack "eksctl-eks-ClickHouseCluster-cluster"
2022-10-29 18:45:49 [ℹ]  waiting for CloudFormation stack "eksctl-eks-ClickHouseCluster-cluster"
2022-10-29 18:46:21 [ℹ]  waiting for CloudFormation stack "eksctl-eks-ClickHouseCluster-cluster"
2022-10-29 18:47:22 [ℹ]  waiting for CloudFormation stack "eksctl-eks-ClickHouseCluster-cluster"
2022-10-29 18:48:23 [ℹ]  waiting for CloudFormation stack "eksctl-eks-ClickHouseCluster-cluster"
2022-10-29 18:49:24 [ℹ]  waiting for CloudFormation stack "eksctl-eks-ClickHouseCluster-cluster"
2022-10-29 18:50:25 [ℹ]  waiting for CloudFormation stack "eksctl-eks-ClickHouseCluster-cluster"
2022-10-29 18:51:31 [ℹ]  waiting for CloudFormation stack "eksctl-eks-ClickHouseCluster-cluster"
2022-10-29 18:52:32 [ℹ]  waiting for CloudFormation stack "eksctl-eks-ClickHouseCluster-cluster"
2022-10-29 18:53:33 [ℹ]  waiting for CloudFormation stack "eksctl-eks-ClickHouseCluster-cluster"
2022-10-29 18:54:35 [ℹ]  waiting for CloudFormation stack "eksctl-eks-ClickHouseCluster-cluster"
2022-10-29 18:55:36 [ℹ]  waiting for CloudFormation stack "eksctl-eks-ClickHouseCluster-cluster"
2022-10-29 18:56:38 [ℹ]  waiting for CloudFormation stack "eksctl-eks-ClickHouseCluster-cluster"
2022-10-29 18:58:49 [ℹ]  building managed nodegroup stack "eksctl-eks-ClickHouseCluster-nodegroup-eks-ClickHouse"
2022-10-29 18:58:50 [ℹ]  deploying stack "eksctl-eks-ClickHouseCluster-nodegroup-eks-ClickHouse"
2022-10-29 18:58:50 [ℹ]  waiting for CloudFormation stack "eksctl-eks-ClickHouseCluster-nodegroup-eks-ClickHouse"
2022-10-29 18:59:21 [ℹ]  waiting for CloudFormation stack "eksctl-eks-ClickHouseCluster-nodegroup-eks-ClickHouse"
2022-10-29 19:00:17 [ℹ]  waiting for CloudFormation stack "eksctl-eks-ClickHouseCluster-nodegroup-eks-ClickHouse"
2022-10-29 19:01:26 [ℹ]  waiting for CloudFormation stack "eksctl-eks-ClickHouseCluster-nodegroup-eks-ClickHouse"
2022-10-29 19:01:27 [ℹ]  waiting for the control plane to become ready
2022-10-29 19:01:27 [✔]  saved kubeconfig as "/Users/sakthivel/.kube/config"
2022-10-29 19:01:27 [ℹ]  no tasks
2022-10-29 19:01:27 [✔]  all EKS cluster resources for "eks-ClickHouseCluster" have been created
2022-10-29 19:01:28 [ℹ]  nodegroup "eks-ClickHouse" has 1 node(s)
2022-10-29 19:01:28 [ℹ]  node "ip-192-168-1-0.us-east-2.compute.internal" is ready
2022-10-29 19:01:28 [ℹ]  waiting for at least 1 node(s) to become ready in "eks-ClickHouse"
2022-10-29 19:01:28 [ℹ]  nodegroup "eks-ClickHouse" has 1 node(s)
2022-10-29 19:01:28 [ℹ]  node "ip-192-168-1-0.us-east-2.compute.internal" is ready
2022-10-29 19:01:30 [ℹ]  kubectl command should work with "/Users/sakthivel/.kube/config", try 'kubectl get nodes'
2022-10-29 19:01:30 [✔]  EKS cluster "eks-ClickHouseCluster" in "us-east-2" region is ready
At the end, you might see the “EKS cluster <ClusterName> in <region> is ready” logs.
2022-10-29 19:01:30 [✔] EKS cluster "eks-ClickHouseCluster" in "us-east-2" region is ready
from console,

Creating Add-on for EBS CSI driver
Now we have the Amazon EKS cluster running. Before configuring the ClickHouse cluster, we need to make sure that we have configured the EBS CSI driver for the EKS cluster.
The Amazon Elastic Block Store (Amazon EBS) Container Storage Interface (CSI) driver allows Amazon Elastic Kubernetes Service (Amazon EKS) clusters to manage the lifecycle of Amazon EBS volumes for persistent volumes.
The following steps can be used to add the EBS driver to cluster.
To create IAM Open ID Connect provider,
eksctl utils associate-iam-oidc-provider --region=us-east-2 --cluster=eks-ClickHouseCluster --approve
To create IAM role for service account,
eksctl create iamserviceaccount --name ebs-csi-controller-sa --namespace kube-system --cluster eks-ClickHouseCluster --attach-policy-arn arn:aws:iam::aws:policy/service-role/AmazonEBSCSIDriverPolicy --approve --role-only --role-name AmazonEKS_EBS_CSI_DriverRoleForClickHouse --region us-east-2
To create the add-on,
eksctl create addon --name aws-ebs-csi-driver --cluster eks-ClickHouseCluster --service-account-role-arn arn:aws:iam::01111111111111:role/AmazonEKS_EBS_CSI_DriverRoleForClickHouse --force --region us-east-2
The final output will be like below,
2022-10-29 23:48:48 [ℹ]  Kubernetes version "1.23" in use by cluster "eks-ClickHouseCluster"
2022-10-29 23:48:48 [ℹ]  using provided ServiceAccountRoleARN "arn:aws:iam::0111111111111:role/AmazonEKS_EBS_CSI_DriverRoleForClickHouse"
2022-10-29 23:48:48 [ℹ]  creating addon
2022-10-29 23:50:25 [ℹ]  addon "aws-ebs-csi-driver" active
Note: Make sure to replace the cluster name, region, user ID on the above commands. The ID, you can get it from AWS console user section.
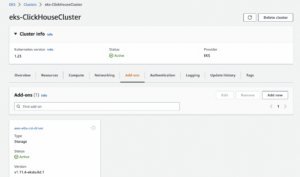
You can use the following command to verify the EDS add-on status.
ubuntu@eksClick:~$ kubectl get pods -n kube-system | grep -i ebs
ebs-csi-controller-65d9ff4584-47nhn   6/6     Running   0          36h
ebs-csi-controller-65d9ff4584-ph4gc   6/6     Running   0          36h
ebs-csi-node-kwzlm                    3/3     Running   0          36h
From console,
Cloning cluster configurations
The next step is, we need to configure the ClickHouse cluster. The configs are publicly available in our repository. You can clone them directly as following.
ubuntu@eksClick:~$ git clone https://github.com/ChistaDATA/clickhouse_lab.git
Cloning into 'clickhouse_lab'...
remote: Enumerating objects: 9, done.
remote: Counting objects: 100% (9/9), done.
remote: Compressing objects: 100% (8/8), done.
remote: Total 9 (delta 1), reused 0 (delta 0), pack-reused 0
Receiving objects: 100% (9/9), 29.61 KiB | 286.00 KiB/s, done.
Resolving deltas: 100% (1/1), done.
Once you have cloned the repository, you might see the following files under the folder “clickhouse_lab/ClickHouseCluster”.
ubuntu@eksClick:~$ cd clickhouse_lab/ClickHouseCluster/
ubuntu@eksClick:~/clickhouse_lab/ClickHouseCluster$
ubuntu@eksClick:~/clickhouse_lab/ClickHouseCluster$ ls -lrth
total 252K
-rw-rw-r-- 1 ubuntu ubuntu  254 Oct 28 15:13 create-zookeeper
-rw-rw-r-- 1 ubuntu ubuntu  241 Oct 28 15:13 create-operator
-rw-rw-r-- 1 ubuntu ubuntu  199 Oct 28 15:13 create-cluster
-rw-rw-r-- 1 ubuntu ubuntu 1.6K Oct 28 15:13 cluster.yaml
-rw-rw-r-- 1 ubuntu ubuntu 6.1K Oct 28 15:13 zookeeper.yaml
-rw-rw-r-- 1 ubuntu ubuntu 227K Oct 28 15:13 operator.yaml
Here you can see three .yaml files and the respective bash files. We can execute the bash files one by one, it will call the respective config and build the cluster.
First we need to call the operator script as shown below,
ubuntu@eksClick:~$ ./create-operator
namespace/chista-operator created
customresourcedefinition.apiextensions.k8s.io/clickhouseinstallations.clickhouse.altinity.com created
customresourcedefinition.apiextensions.k8s.io/clickhouseinstallationtemplates.clickhouse.altinity.com created
customresourcedefinition.apiextensions.k8s.io/clickhouseoperatorconfigurations.clickhouse.altinity.com created
serviceaccount/clickhouse-operator created
clusterrole.rbac.authorization.k8s.io/clickhouse-operator-chista-operator created
clusterrolebinding.rbac.authorization.k8s.io/clickhouse-operator-chista-operator created
configmap/etc-clickhouse-operator-files created
configmap/etc-clickhouse-operator-confd-files created
configmap/etc-clickhouse-operator-configd-files created
configmap/etc-clickhouse-operator-templatesd-files created
configmap/etc-clickhouse-operator-usersd-files created
deployment.apps/clickhouse-operator created
service/clickhouse-operator-metrics created
Secondly, we need to call the zookeeper script,
ubuntu@eksClick:~$ ./create-zookeeper
namespace/chista-zookeeper created
service/zookeeper created
service/zookeepers created
poddisruptionbudget.policy/zookeeper-pod-disruption-budget created
statefulset.apps/zookeeper created
Finally, need to call the cluster script as shown below,
ubuntu@eksClick:~$ ./create-cluster
clickhouseinstallation.clickhouse.altinity.com/herc created
ClickHouse Cluster is created. We can verify this using the following command.
ubuntu@eksClick:~$ kubectl get pods -n chista-operator
NAME                                   READY   STATUS    RESTARTS   AGE
chi-herc-herc-cluster-0-0-0            2/2     Running   0          36h
chi-herc-herc-cluster-0-1-0            2/2     Running   0          36h
chi-herc-herc-cluster-1-0-0            2/2     Running   0          36h
chi-herc-herc-cluster-1-1-0            2/2     Running   0          36h
clickhouse-operator-58768cf654-h9nrj   2/2     Running   0          36h
From console,
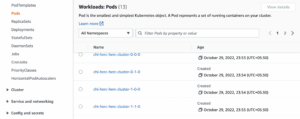
As per the config ( cluster.yaml ), We have mentioned 2 replicas and 2 shards.
ubuntu@eksClick:~$ less cluster.yaml| grep -i 'repl\|shard'
          shardsCount: 2
          replicasCount: 2
Here,
- “chi-herc-herc-cluster-0-0-0” and “chi-herc-herc-cluster-1-0-0” are the shards.
- “chi-herc-herc-cluster-0-1-0” and “chi-herc-herc-cluster-1-1-0” are the respective replicas.
Shard 1:
chi-herc-herc-cluster-0-0-0
  \_chi-herc-herc-cluster-0-1-0
Shard 2:
chi-herc-herc-cluster-1-0-0
  \_chi-herc-herc-cluster-1-1-0
The cluster setup is completed!
Testing the connections and cluster status
You can use the following command to go directly login the ClickHouse shell.
ubuntu@ip-172-31-2-151:~$ kubectl exec -it chi-herc-herc-cluster-0-0-0 -n chista-operator -- clickhouse-client
Defaulted container "clickhouse" out of: clickhouse, clickhouse-log
ClickHouse client version 21.10.5.3 (official build).
Connecting to localhost:9000 as user default.
Connected to ClickHouse server version 21.10.5 revision 54449.

chi-herc-herc-cluster-0-0-0.chi-herc-herc-cluster-0-0.chista-operator.svc.cluster.local :) show databases;

SHOW DATABASES

Query id: f0f16155-9967-479e-b439-e9babdae5799

┌─name────┐
│ default │
│ system  │
└─────────┘

2 rows in set. Elapsed: 0.013 sec.
You can also use the following method to login the OS shell then ClickHouse shell.
ubuntu@ip-172-31-2-151:~$ kubectl exec -it chi-herc-herc-cluster-0-0-0 /bin/bash -n chista-operator
clickhouse@chi-herc-herc-cluster-0-0-0:/$
clickhouse@chi-herc-herc-cluster-0-0-0:/$ clickhouse-client
ClickHouse client version 21.10.5.3 (official build).
Connecting to localhost:9000 as user default.
Connected to ClickHouse server version 21.10.5 revision 54449.

chi-herc-herc-cluster-0-0-0.chi-herc-herc-cluster-0-0.chista-operator.svc.cluster.local :) show databases;

SHOW DATABASES

Query id: ee1e1378-4881-4c23-b76c-67ee3cc417c8

┌─name────┐
│ default │
│ system  │
└─────────┘

2 rows in set. Elapsed: 0.003 sec.
ClickHouse cluster status:
chi-herc-herc-cluster-0-0-0.chi-herc-herc-cluster-0-0.chista-operator.svc.cluster.local :) SELECT
:-]     cluster,
:-]     shard_num,
:-]     replica_num,
:-]     host_name
:-] FROM system.clusters
:-] WHERE cluster = 'herc-cluster'

SELECT
    cluster,
    shard_num,
    replica_num,
    host_name
FROM system.clusters
WHERE cluster = 'herc-cluster'

Query id: fc87564e-3602-4a35-a7ae-c39a2cd5109d

┌─cluster──────┬─shard_num─┬─replica_num─┬─host_name─────────────────┐
│ herc-cluster │         1 │           1 │ chi-herc-herc-cluster-0-0 │
│ herc-cluster │         1 │           2 │ chi-herc-herc-cluster-0-1 │
│ herc-cluster │         2 │           1 │ chi-herc-herc-cluster-1-0 │
│ herc-cluster │         2 │           2 │ chi-herc-herc-cluster-1-1 │
└──────────────┴───────────┴─────────────┴───────────────────────────┘

4 rows in set. Elapsed: 0.007 sec.
From the above output, We have overall 4 nodes. For shard_num “1”, we have two nodes, and for shard_num “2” we have two nodes, and we can see the respective replicas as well. So, the configuration is perfect!
Conclusion
Hopefully, this blog will help you understand the configurations involved in the ClickHosue cluster on Amazon EKS. We will continue with this series and come up with the final part ( GKE ) soon. Thank you!