Introduction
ChistaData Cloud is a state-of-the-art, zero-maintenance Database as a Service (DBaaS) for ClickHouse®. It provides an all-inclusive infrastructure service that simplifies the creation, operation, and scaling of ClickHouse® databases. The service is backed by fault-tolerant features and comprehensive monitoring capabilities to ensure optimal performance.
Objective
This guide will cover a simple sign-up process and explain how to launch your cluster, enabling you to start using our platform in no time. We have outlined below necessary steps to help you get started. So let’s dive right in and get started with the sign-up process!
Organization Sign Up
If you are a first-time user in the world of ClickHouse Cloud and wish to explore our services, you will need to register as an organization and activate your account. It’s a quick and easy process, and then it will allow you to take advantage of our comprehensive range of services.
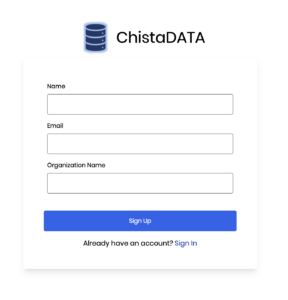
Customers can create an Organization account using the self sign-up form provided on the landing page.
- Go to https://chistadata.io/, and Get Started
- Enter your Name, Email address, and Organisation name.
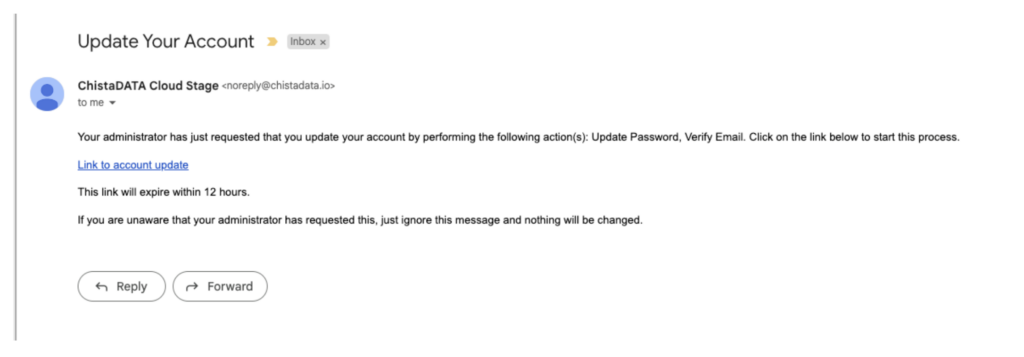
- An email will be sent to the provided email address with the instructions to join the newly created organization as Org Admin.
Account Activation
An email will be sent with a link, An invitation will have a link to activate your account. At first login, it will ask you to change/confirm your password.
Create Workspace under an Organization
Once you are logged in you can start creating the workspace and clusters.
What is Workspace: ChistaDATA offers workspaces, which are logical groupings of clusters that allow users to manage their resources efficiently. With workspaces, users can easily keep their clusters separate from each other, enabling better management and maintenance of their resources. Additionally, workspaces enable access management based on workspace membership, making it easy to delegate responsibilities and manage resource access securely. Users can assign workspace admins, giving them control over all clusters within that workspace, which can help teams work more efficiently.
Steps to create a workspace :
- Navigate to the portal home page.
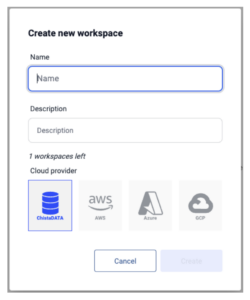
- Click on create workspace option from the navigation bar, you will be redirected to the below screen
- Enter the workspace name and description.
- Select the cloud provider type from the options and click the CREATE button.
- The newly created workspace will be shown on the portal home screen instantly.
Provisioning Cluster
Once your workspace is ready, start creating clusters under the same workspace.
What is Cluster: Cluster refers to a group of managed database ClickHouse® nodes on the cloud, which is a database management service provided by ChistaDATA. This service allows users to effortlessly deploy, manage, and scale their database clusters without needing to concern themselves with the underlying infrastructure. With the cloud provider handling the hardware and software infrastructure, users can concentrate on using the database, building applications, and managing their data. This solution is especially beneficial for developers and businesses, making it easier to deploy and scale databases with minimal effort.
To create a cluster follow the below steps:
- Select the workspace where you want to create the cluster by clicking on the VIEW CLUSTERS button
- Click the New Cluster option from the navigation menu.
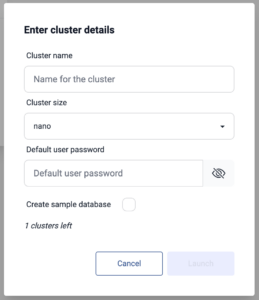
- Enter Cluster name, Cluster Size, and default user password
- Click LAUNCH button
Try Sample Queries
While creating a new cluster on the portal, you will have the option to load sample data. By selecting this option, two sample tables, customers and orders, will be loaded into the SAMPLE_SCHEMA database. These tables serve as a sandbox environment to explore and test the functionalities of the cluster.
After the database is brought online, we can access its data by using the Query Editor feature available on the portal. This feature allows us to run queries and verify the data stored in the database.
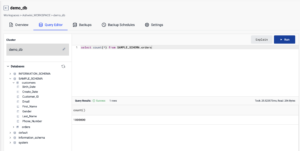
Here are some example queries that you can use for testing purposes.
1. Calculate the average order amount for each year from the “orders” table and displayed it in a bar chart.
SELECT
toYear(Order_Date) AS year,
round(avg(Order_Total)) AS AverageOrderAmount,
bar(AverageOrderAmount, 0, 100000, 80)
FROM SAMPLE_SCHEMA.orders
GROUP BY year
ORDER BY year;
2. Get the average order amount for each year for orders that were delivered in California in ascending order by year.
SELECT
toYear(Order_Date) AS year,
round(avg(Order_Total)) AS AverageOrderAmount
FROM SAMPLE_SCHEMA.orders
WHERE State='CA' and Status='Delivered'
GROUP BY year
ORDER BY year;
3. Selecting the total order amount for each state with an Order Count of at least 10,000, for orders from 2021 and onwards. The results are ordered by the total order amount in descending order.
SELECT
State,
count() AS OrderCount,
round(sum(Order_Total)) AS TotalOrderAmount
FROM SAMPLE_SCHEMA.orders
WHERE toYear(Order_Date)>=2021
GROUP BY
State
HAVING OrderCount >= 10000
ORDER BY TotalOrderAmount DESC
4. Displaying the customer, order, and payment details for the specified customer by joining the “orders” and “customers” tables on the “Customer_ID” column.
SELECT
c.First_Name||' '||c.Last_Name as Customer_Name,
c.Gender,
o.Order_Date,
o.Order_Total,
o.Status,
o.Payment_Status,
o.Shipping_Method,
o.Payment_Method,
o.State
FROM SAMPLE_SCHEMA.orders o,SAMPLE_SCHEMA.customers c
WHERE
o.Customer_ID= c.Customer_ID
and c.Customer_ID=9665
5. Selecting Minimum and Maximum amount of orders that are grouped by gender, payment method, year, and state in ascending order by joining orders and customers tables.
SELECT
c.Gender,
o.Payment_Method,
toYear(o.Order_Date) as OrderYear,
o.State,
min(Order_Total) as MinimumOrderAmount,
max(Order_Total) as MaximumOrderAmount
FROM SAMPLE_SCHEMA.orders o,SAMPLE_SCHEMA.customers c
WHERE
o.Customer_ID= c.Customer_ID
GROUP BY
c.Gender,
o.Payment_Method,
OrderYear,
o.State
ORDER BY toYear(o.Order_Date);
Conclusion
To conclude, we have covered the steps to sign up for a new organization, how to create a new cluster under a specified workspace, and how to load dummy data to execute sample queries.
So why delay any further? Start your free trial – ChistaDATA offers new customers the opportunity to explore services before making a commitment. As we understand the importance of finding the right fit for your business. We are pleased to provide a complimentary trial period of 90 days. This enables you to experience our services and determine if they meet your expectations and requirements. We warmly welcome you to take advantage of this opportunity to discover the benefits of partnering with ChistaDATA Cloud.
For any questions, reach out to us at https://github.com/ChistaDATA/Cloud/discussions
To know more about ChistaDATA Cloud for ClickHouse, do read the following articles: