ClickHouse is renowned for its impressive performance and scalability as an open-source columnar database management system. With its versatility and power, ClickHouse is a go-to choice for data-intensive applications. If you have a ClickHouse instance up and running, there are multiple ways to establish a connection. In this guide, we will provide you with a seamless walkthrough on how to connect to your ClickHouse cluster created in ChistaDATA DBaaS using the popular tool, DBeaver.

DBeaver is a free, open-source, graphical database management tool for database developers and administrators.
This tool can be used to create and manage databases across a wide range of database management systems and It is a multi-platform tool – it works on Windows, Linux, Mac, and Solaris.
DBeaver is available at https://dbeaver.io/download/
Pre-requisites
– A Running host from ChistaData (any tier/size)
– DBeaver installed and running
– DBeaver uses JDBC over HTTP(S) to connect to ClickHouse (DBeaver auto-installs these drivers while establishing a connection)
Connection String
The following example is based on connecting to the ChistaDATA cloud database, with the following settings:
- Server: ws44-ch64.db.chistadata.io
- Port: 8443
- Database: default
- Username: default
- Password: ***** (Use the same password which you entered while creating DB Host)
- Secure: yes
To get the connection string and to know how to launch a cluster in the ChistaDATA portal, kindly refer Get started with chistadata cloud guide.
Step-by-step instructions
Once you have the connection string ready, follow the below steps.
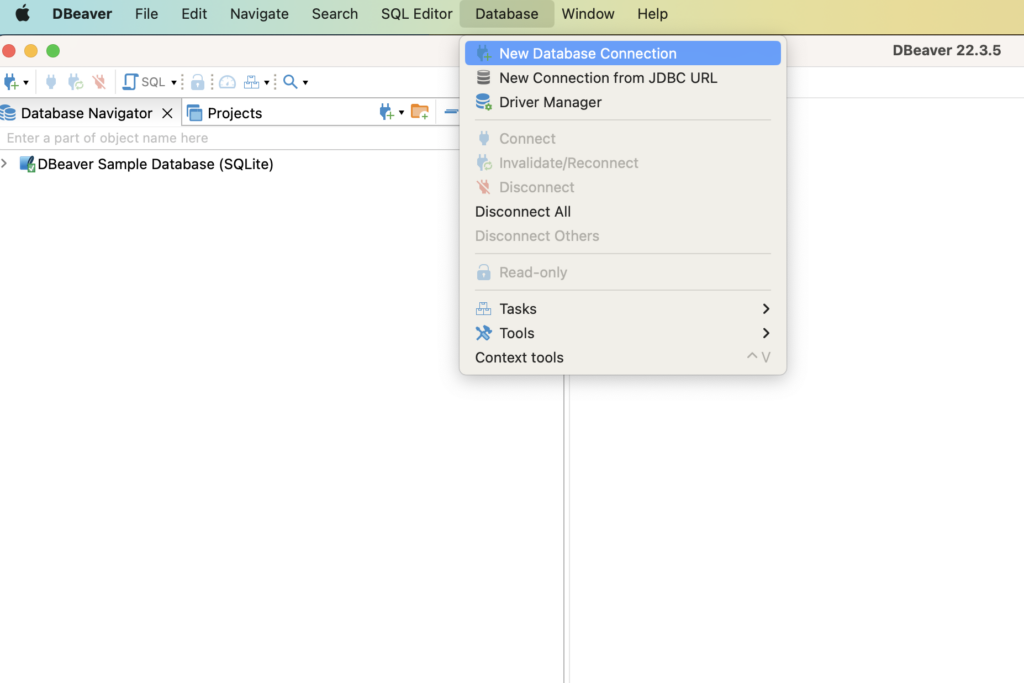
1. Use the Database > New Database Connection menu to bring up the Connect to a database dialog
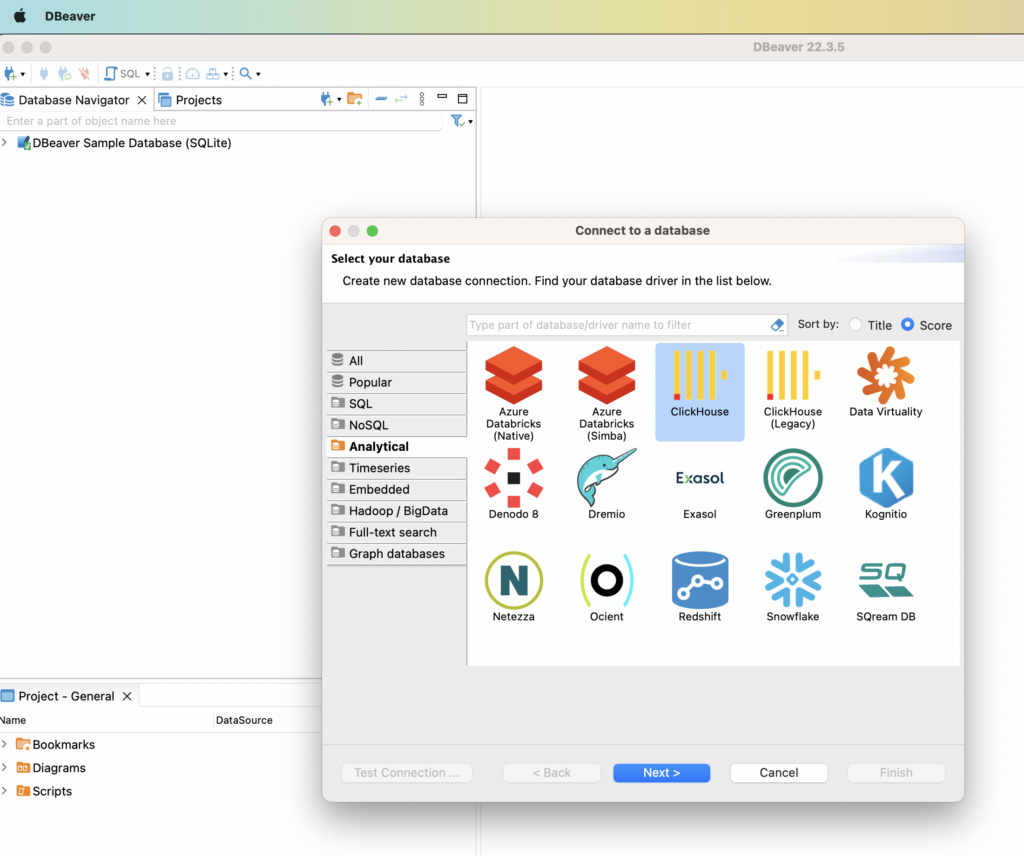
2. Select Clickhouse from the Analytical tab
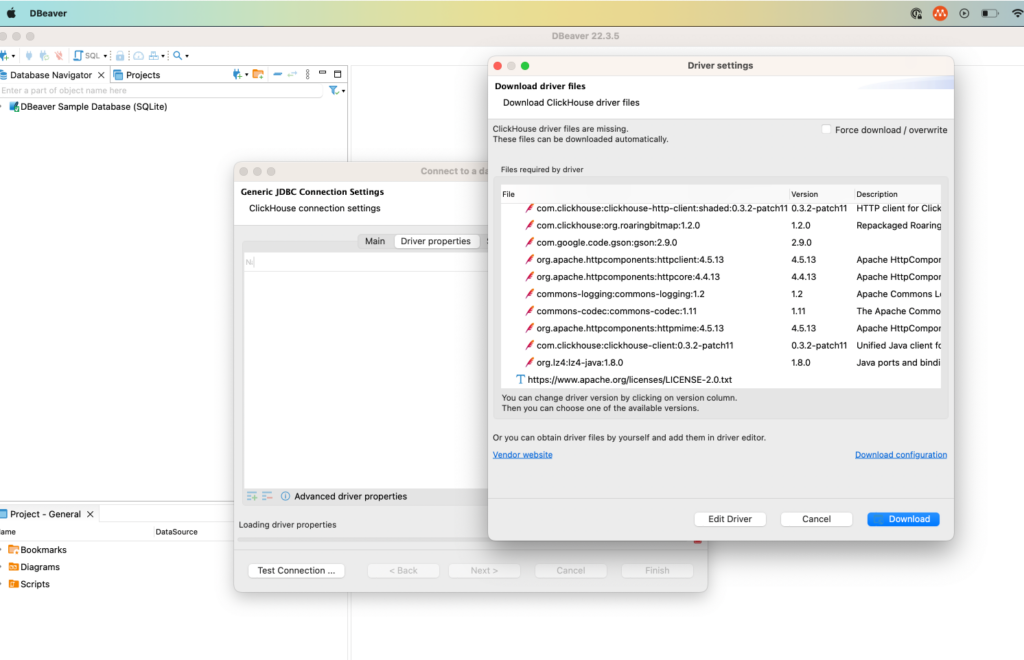
3. DBeaver will automatically install the required JDBC driver.
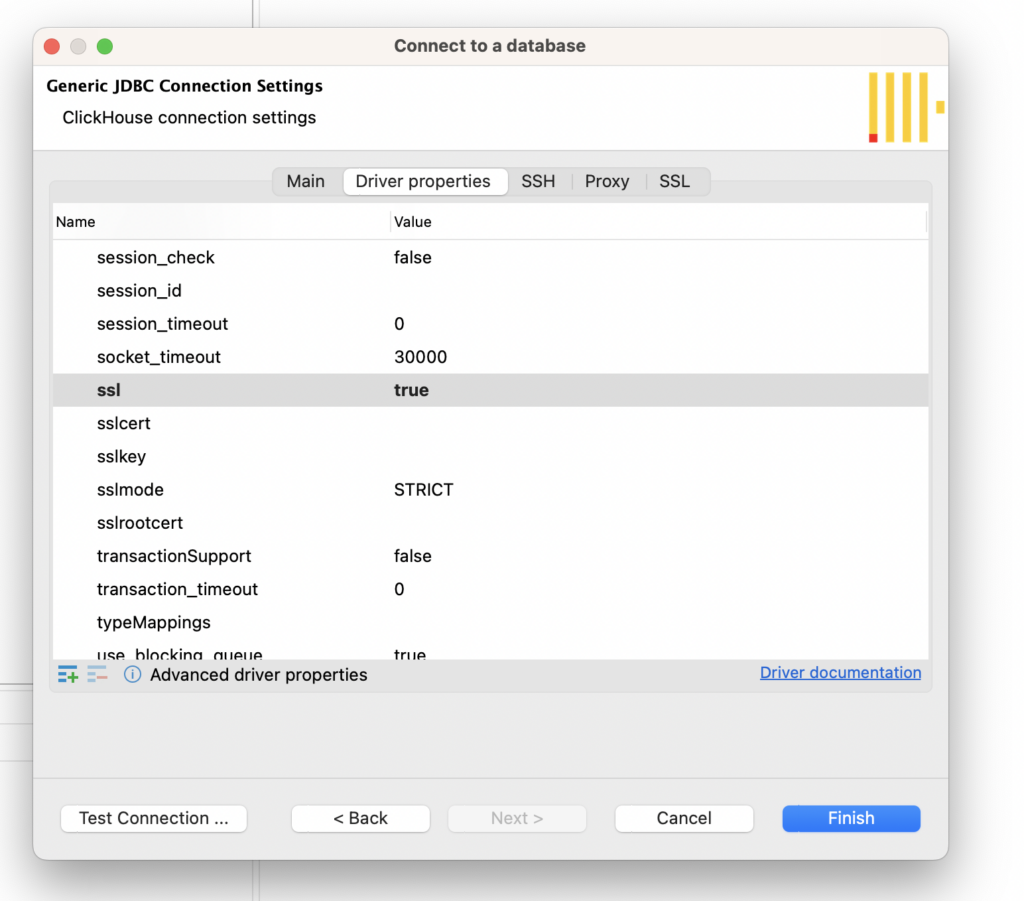
4. By default the Driver properties > SSL will be set to false, change this setting and set Driver properties > SSL to true because we at ChistaDATA only allow TLS/SSL connectivity to backend databases.
5. Enter connection details to build JDBC URL, Like HOST, PORT (As 8443 [https port]), USERNAME, and PASSWORD
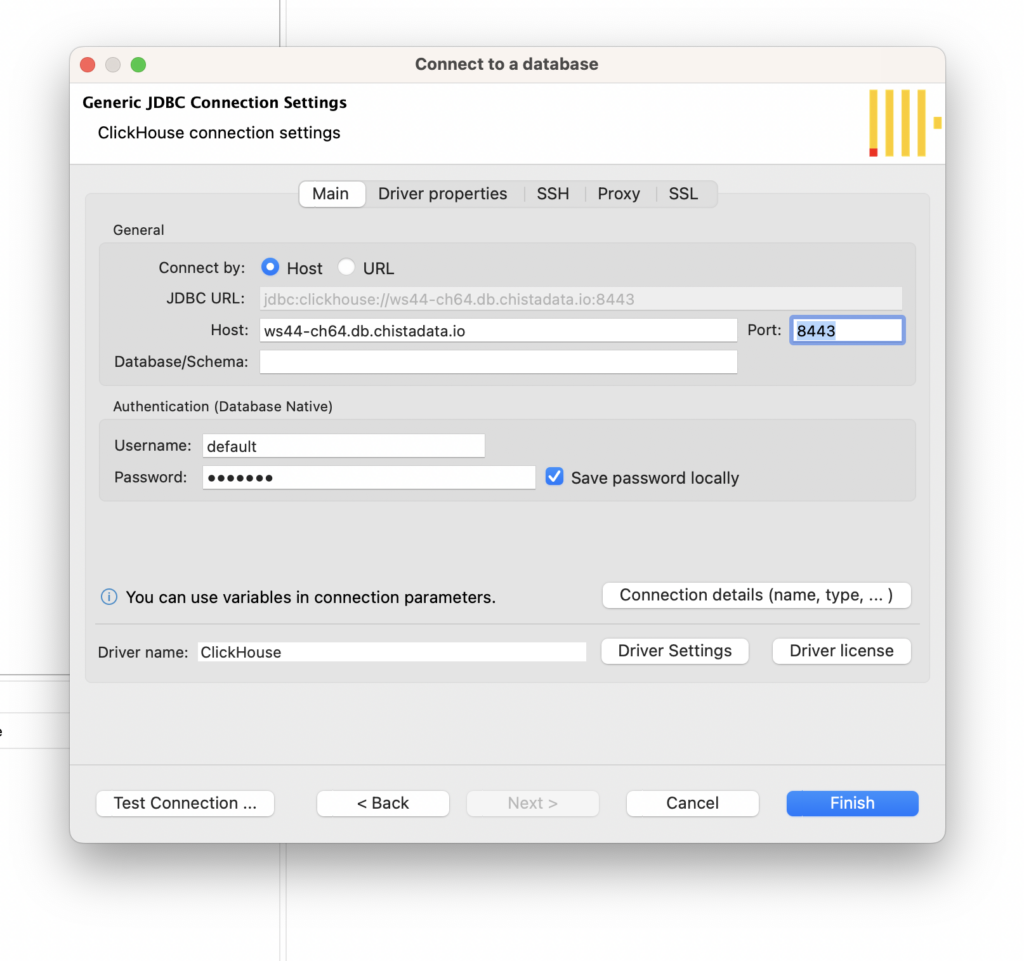
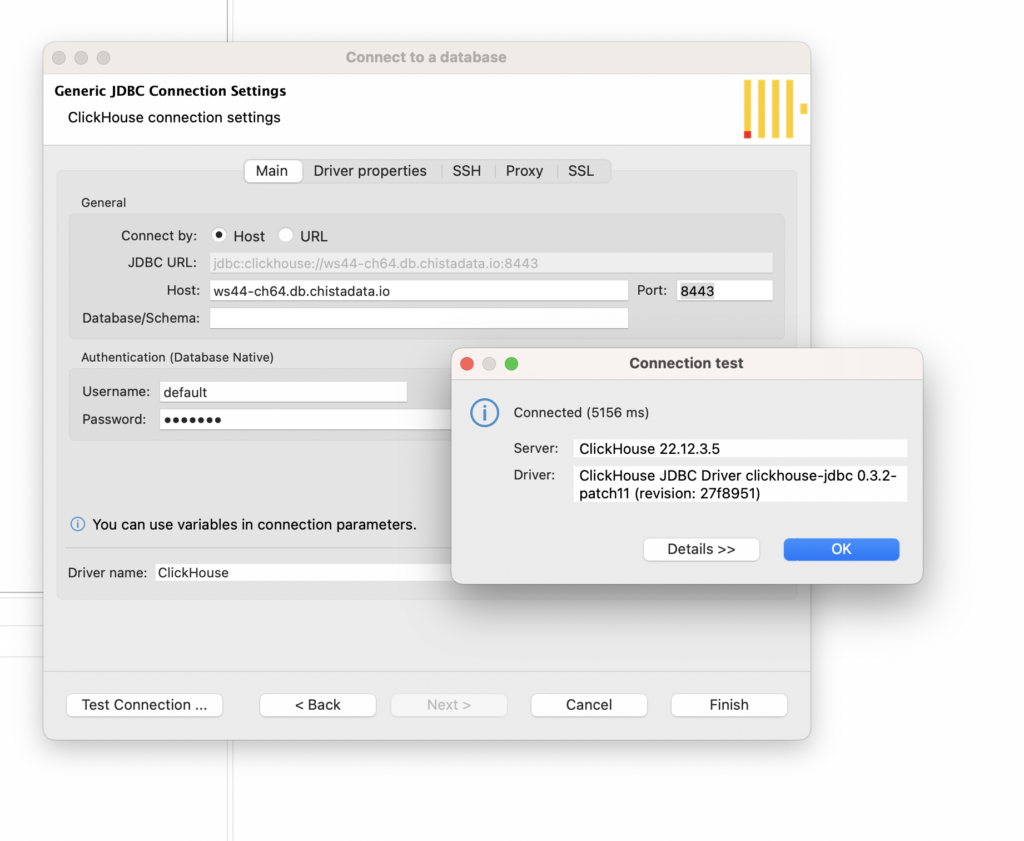
6. Test the connection and click Finish.
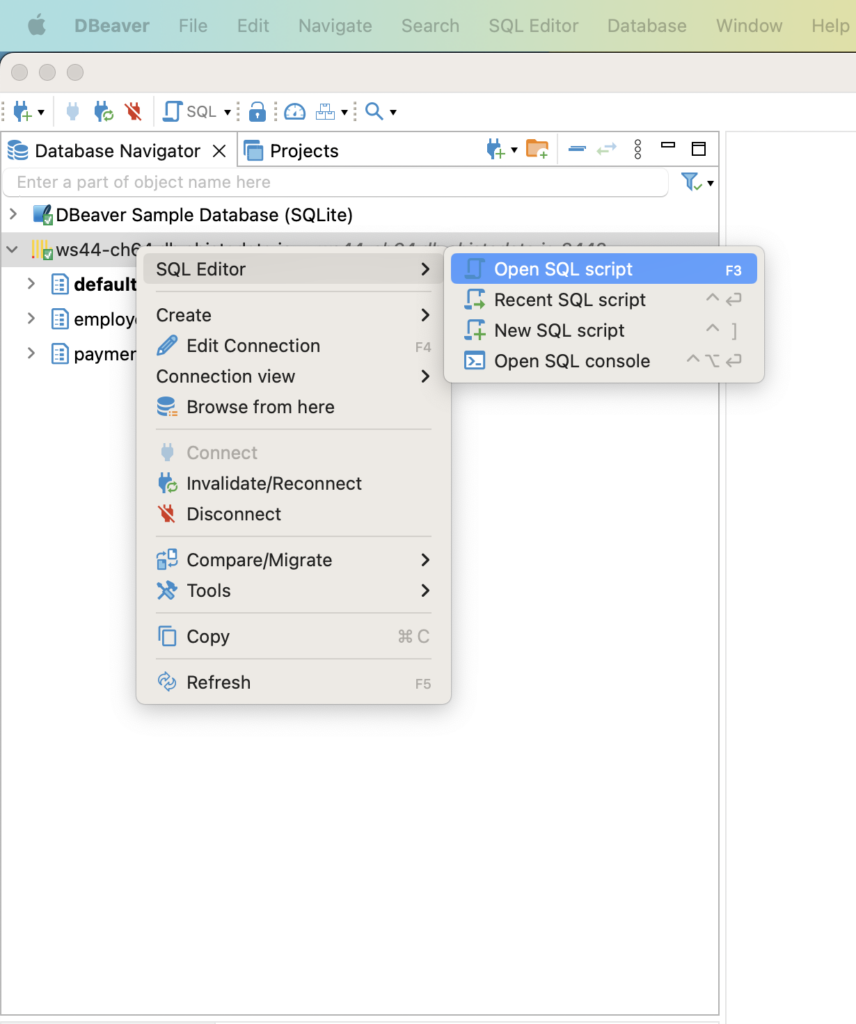
7. Right click on your connection and choose SQL Editor > Open SQL Script to open a query editor:
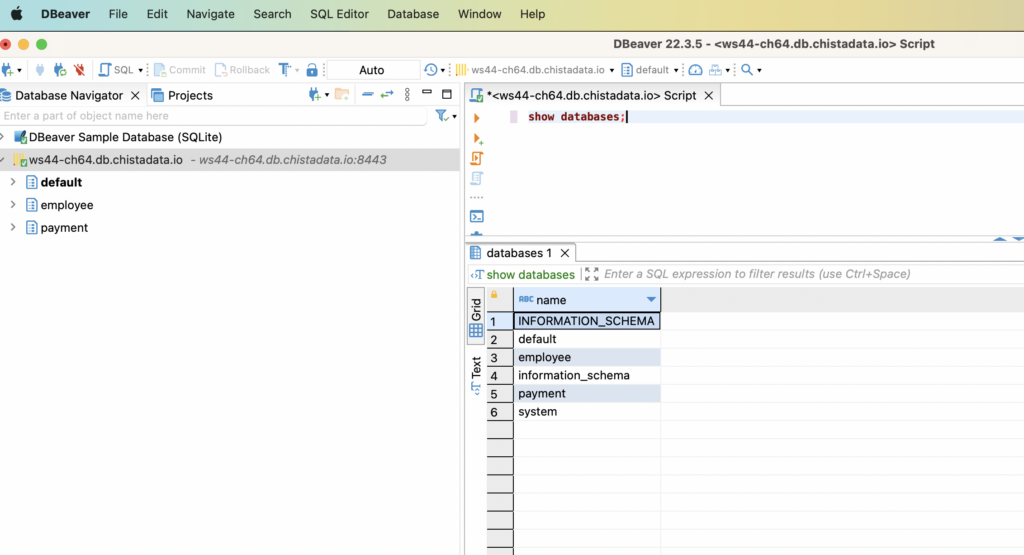
8. Execute sample query
Thats all. You have connected your database using DBeaver.